

Step-by-step guide: Authentic studio portraits
Creating a studio portrait that truly tells who you are is one of the most demanding challenges in photography. It's not enough to place someone in front of a background and shoot: most sessions produce correct but empty images, where the person looks like a well-lit mannequin. The difference between a photo and an artistic portrait lies in the method, in emotional preparation, and in the photographer's ability to create a space where authenticity emerges naturally. In this guide, I explain step by step how to achieve it from the first idea to the final image.
Table of contents
- Preparation: define the objective and create the moodboard
- Essential equipment: camera, lenses, and accessories for portraits
- Studio lighting: key schemes and nuances
- Poses, direction, and connection: the art of guiding the subject
- Shooting and adjustments: technical parameters for professional results
- Post-production: selection and natural retouching
- Do you want artistic and authentic portraits in Palma?
- Frequently asked questions about studio portraits
Key Points
| Point | Details |
|---|---|
| Preparation is key | Defining the objective and building the moodboard ensures authentic portraits aligned with identity. |
| Proper equipment and light | The chosen camera and lighting techniques directly influence the quality and emotion of the final portrait. |
| Direction and connection | Guiding the subject and creating a relaxed environment guarantees natural poses and photographs with personality. |
| Shooting and post-production | Technical adjustments and natural retouching help preserve each person's essence in the images. |
| Professional results in Palma | Having portrait services in Palma makes it easier to obtain artistic and emotional photographs with expert quality. |
Preparation: define the objective and create the moodboard
Once the challenge is understood, the first step is to prepare the vision and the right environment. Before turning on a single flash, you need to know what story you want to tell. Is it a personal portrait to reflect your character? An image for personal branding to convey professional confidence? The objective defines everything else.
The moodboard is your visual map. It gathers references of lighting, color palettes, poses, and moods that connect with the personality of the subject. As the studio portrait guide points out, the moodboard and the goal allow for a coherent and deliberate reflection of the subject's identity and emotions. Without that map, the session turns into improvisation.
Clothing is another element that many underestimate. Each garment communicates something: colors, textures, and silhouettes that reflect personality through clothing immediately and powerfully. Ask your subject to bring several options and choose together the ones that best fit the session's goal.
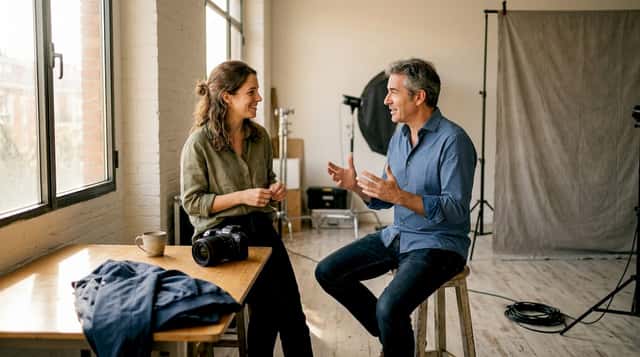
The prior dialogue is equally important. A 15-minute conversation before the session can completely transform the outcome because it allows you to understand fears, expectations, and personality traits that will then guide the emotional direction. To understand how to capture your essence in images, this step is essential.
Key points for preparation:
- Define the purpose: personal, professional, artistic, or commercial
- Create a moodboard with at least 10 visual references
- Select clothing that reflects identity, not that disguises it
- Talk with the subject before the session to build trust
- Note the key elements you want to convey in each image
Professional tip: Authenticity over excessive retouching begins in preparation. If the subject arrives wearing clothing that does not represent them or without having reflected on their image, no post-production filter will make up for it.
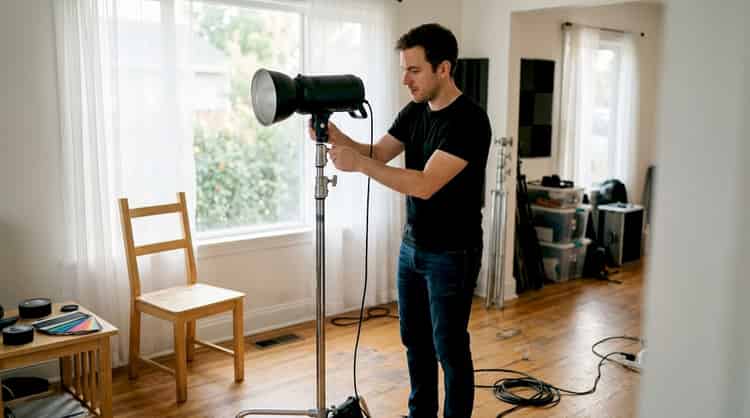
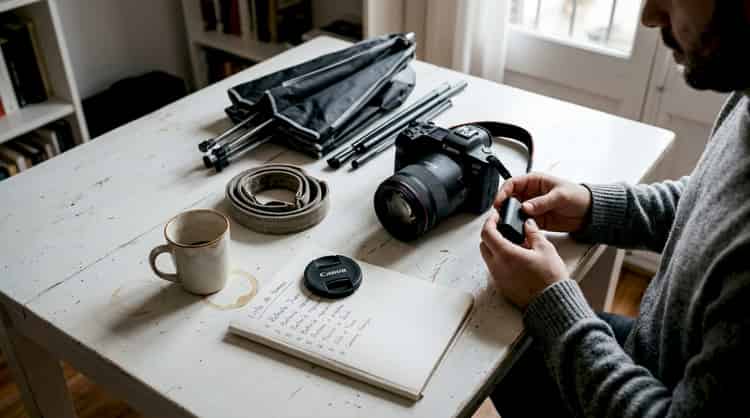
Essential equipment: camera, lenses, and accessories for portraits
With a clear vision, the next step is to choose the right equipment to materialize it. You don't need the most expensive equipment on the market, but you do need the most suitable for the type of portrait you are aiming for.
| Feature | Mirrorless | DSLR |
|---|---|---|
| Weight and size | More compact | Bulkier |
| Autofocus | Faster and more accurate | Solid but slower |
| Electronic viewfinder | Yes, shows real exposure | Optical, without preview |
| Battery | Shorter duration | Longer duration |
| Average price | Higher | Lower |
As the studio portrait guide indicates, the mirrorless camera and lenses from 50 to 85mm prevent distortion and allow for precise focus on the eyes, which is where the emotion of the portrait lives. Also, avoiding distortion with lenses under 50mm is a basic rule: wide angles distort facial features and take the viewer away from authenticity.
Essential accessories for the studio:
- 400W or more studio flash for total light control
- Large softbox (minimum 60x90 cm) to soften shadows
- Silver or white reflector to fill in dark areas
- Neutral colored fabric or paper backdrop
- Tripod for precise and repeatable framing
If you are thinking of setting up your own space, you can learn more about how to create your own studio with accessible resources. And if you prefer to practice before investing, the equipment and accessories available in specialized workshops are an excellent option.
Studio lighting: key schemes and nuances
With the equipment ready, it’s time to develop the atmosphere and visual character through light. Lighting is not just technical: it is the language with which you describe the character of the subject.
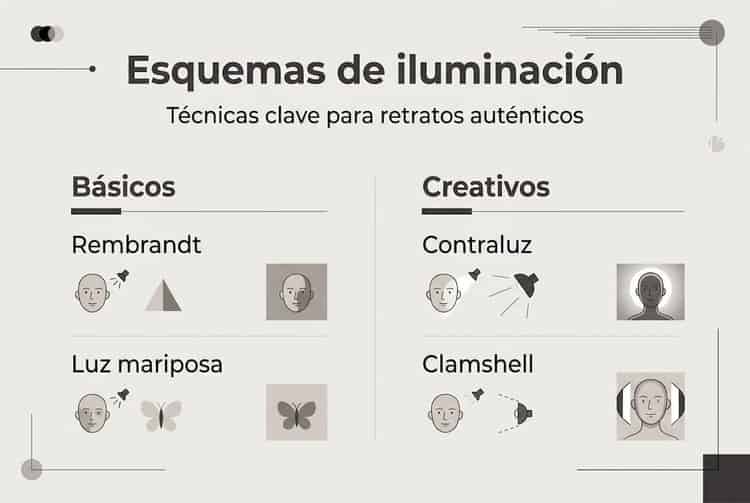
| Scheme | Light Position | Visual Effect | Ideal for |
|---|---|---|---|
| Rembrandt | 45° above and to the side | Shadow triangle on the cheek | Depth and drama |
| Loop | Slightly to the side | Soft shadow under the nose | Versatile portraits |
| Butterfly | Frontal and above | Butterfly-shaped shadow under the nose | Glamour and fashion |
| Split | 90° to the side | Half lit, half in shadow | Character and contrast |
The Rembrandt scheme places the light at 45 degrees above and to the side, creating that characteristic shadow triangle between the nose and cheek that adds depth and three-dimensionality to the face. It is my favorite for portraits with character because it transforms a flat face into a sculpture of light.
The relationship between the main light and the fill light also matters a lot. A 2:1 ratio produces a soft and balanced result, ideal for corporate portraits. A 4:1 ratio generates more contrast and drama, perfect for artistic portraits with strong personality. Additionally, thin faces require Broad lighting, which lights up the wider side of the face to give it more visual presence.
Elements you should not forget:
- Add a catchlight (reflection in the eye) to bring life to the gaze
- Use a background light to separate the subject from the background
- Control harsh shadows with diffusers or reflectors
Comments (0)
No comments yet. Be the first!
Leave a comment
More Posts
Discover Author Photography: Authenticity in Portraits
Discover what author photography is, how it differs from other styles, and why it is the best option for authentic and emotional portraits in Palma de Mallorca.

How to Prepare Authentic Business Team Photos
Learn how to prepare authentic business team photos in Palma de Mallorca: planning, logistics, art direction, and mistakes to avoid.